Posted by: familiabencomo | Saturday, March 14, 2009

Coconut Cupcakes!

My beloved husband came home yesterday with a guilty countenance upon his face….  I knew he was holding back something.  You sense these things.  “So, how was your meeting?” I asked.  (cat swallowed the canary look)  “We, uh, had cupcakes from that place you like.”  (Earth stops its rotation)  “What?!?!”  Seriously, it’s hard for me to imagine a room full of mostly men (all donning pocket protectors and who spent their teen years playing Dungeons & Dragons) sitting around a conference table with a plate full of luscious cupcakes from Sprinkles.  My next question, “Where’s mine?”  (crickets)  After a long, awkward pause where it became apparent that he didn’t hold up to one of our marital vows (to love, honor & remember dessert), the floodgates opened and all he could do was yammer about their perfection for what seemed like eternity.  He saw the look in my eye that serves as a warning to tread carefully and offered to drive to Sprinkles to pick some up.  Being completely placated, I told him that I could just make some here.  A quick search on the internet revealed the cupcake’s recipe that he had just had at the meeting.  What did we ever do before the internet?!?!
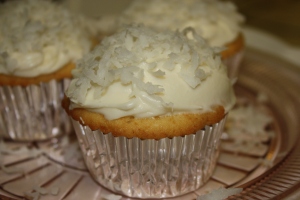
CoconutCupcakes

Great-Grandma’s Coconut Cupcakes

From Sprinkles pastry chef Candace Nelson (LA Times June ’07)

Makes 18 to 20

ž 2 cups sifted cake flour

ž 2 teaspoons baking powder

ž 1/4 teaspoon salt

ž 2/3 cup whole milk

ž 3/4 teaspoon pure vanilla extract

ž 3/4 teaspoon coconut extract

ž 1 1/2 sticks unsalted butter

ž 1 1/3 cups granulated sugar

ž 2 large egg whites, plus 1 whole large egg

Make sure all the ingredients are at room temperature. Heat the oven to 350 degrees and line two greased standard muffin pans with cupcake liners. In a large bowl, whisk together the flour, baking powder and salt. In a measuring cup, combine the milk and extracts. In the bowl of an electric mixer, cream the butter and sugar until light and fluffy. Gradually add the egg whites and the egg and mix until they are combined. Add half of the flour mixture and mix until it is combined. Gradually drizzle in all the milk mixture. Add the remaining dry mixture and mix carefully until just combined. Divide the batter evenly among the cupcake cups (they should be two-thirds full) and bake about 20 to 25 minutes, or until the cake springs back when pressed lightly and an inserted toothpick comes out clean. Let cool.

*

Coconut Cream Cheese Frosting

Makes about 2 1/2 cups

ž 8 ounces cold cream cheese

ž 8 tablespoons butter (1 stick)

ž 1/8 teaspoon salt

ž 3 3/4 cups sifted powdered sugar

ž 1/2 teaspoon pure vanilla extract

ž 1/2 teaspoon coconut extract

ž 1/2 cup sweetened coconut shavings

In the bowl of an electric mixer, slowly mix the cream cheese, butter and salt until fluffy and combined. Slowly add the powdered sugar. Mix in the extracts until incorporated and the frosting is smooth. Frost each cooled cupcake with about 2 tablespoons of frosting and immediately top with 1 teaspoon of sweetened coconut shavings.

NOTES:  I did not change a thing on these recipes.  They are perfect the way they are.  The only slight variation I made was to half the frosting recipe which turned out to be the perfect amount for us.  These are amazingly yummy!
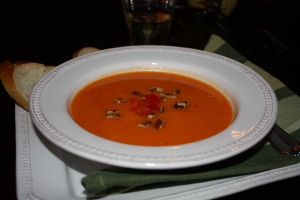
Posted by: familiabencomo | Wednesday, February 18, 2009

Sweet Potato Soup

I know, I know….  It’s been a long time since I have posted anything and I honestly don’t want to sound too pathetic, but I’ve been busy (plus, I’m terrible at managing my time!).  Having 2 kids in school this year actually means twice as many field trips, twice as many parties to plan, and twice as many times I’m in the classroom helping.  I honestly thought it would mean twice as many manicures and coffee dates.  Darn.

Rest assured I have still been feeding my family.  I have even been taking some pictures every now and then….. It’s the sitting down & typing part that’s holding me up.  However, last night I was inspired.  A friend from college sent me a recipe that was so easy & tasty that it had to be shared immediately.

Sweet Potato Soup

Sweet Potato Soup

SWEET POTATO SOUP

2 red bell peppers, seeded and cubed
generous 4 cups diced sweet potatoes
1 onion roughly chopped
2 large garlic cloves, roughly chopped
1 1/4 cups dry white wine
1 1/4 quarts vegetable stock
hot pepper sauce – to taste
salt and freshly ground pepper

Set aside a little diced red pepper for garnish.  Put it peppers, potatoes, onion, garlic, stock in a large saucepan and bring to a boil. Lower the heat and simmer for 30 mins, or until all veggies are soft.  Blender/food processor until smooth.  Season to taste with salt, pepper and hot pepper sauce.  Cool slightly. Garnish with reserved red pepper and serve warm or at room temperature.

Serve with fresh chunky bread!

MY NOTES:  I pretty much doubled this recipe because I like having something ready for lunch (especially this week with the kids out of school).  Instead of doubling the veggie stock, I used chicken stock for the additional amount needed.  I also used pecan bits as garnish…. my family thought I was weird so I suggest skipping that.  By the end of the meal, I made the comment that this soup was really quite filling & my husband reminded me that I had THREE bowls.  Thanks, dear!

Thank you, Tree, for the recipe!

Posted by: familiabencomo | Tuesday, December 23, 2008

Happy Holidays!


familia2008

Here’s wishing everyone the happiest of holidays!  May the wonder & joy of the season be with you & yours throughout the year!!!

Posted by: familiabencomo | Wednesday, October 29, 2008

Daring Bakers’ October Challenge

WooHoo! I could have done this with my eyes closed – not to brag. This was the ideal challenge for me since I bake pizza all the time. Plus, this gave me the opportunity to try a different method for preparing my dough. Perfect, BTW, for the “run-around-town-never-sit-down” person. Once you have the dough in the freezer, you have a quick meal for those crazy days that are bound to happen.

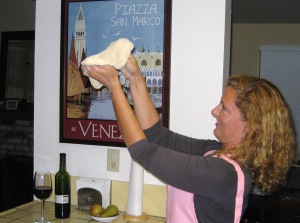
Despite the double-chin that is painfully obvious to me, this photo shows how fun this challenge truly was. My love photographed me laughing & you have to use your imagination to the kinds of jokes we were throwing at each other as I was throwing dough around.

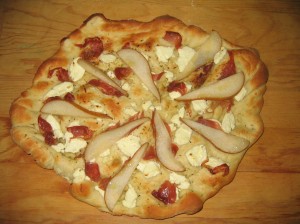
The first pizza I made was a simple dough base with a brushing of EVOO, goat cheese, prosciutto & bosc pear. Obviously, the tossing of the dough doesn’t work for me, However, the taste was sublime. Mi corazon (my heart) fell in love with me all over again.

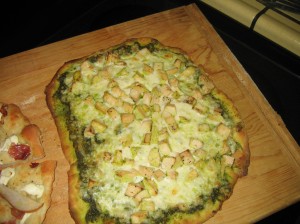
The second pizza was made with pesto, mozzarella & chicken. I made the pesto with lots of fresh basil leaves, 3 garlic cloves, 3/4 cup EVOO, ~1/4 cup pistachios – that’s all.

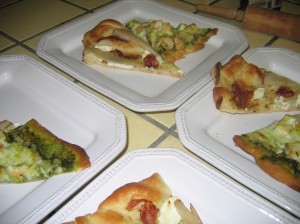
Overall, the family was quite impressed with the improvement I made with my pizza technique. Thank you Rosa (and Sher and Glenna ) for this amazingly satisfying challenge. I finally felt the urgency the buy a pizza stone ($9.99 at Target, not bad!) and that has made a world of difference. Everyone enjoyed their meal & there were no leftovers. In fact, it reminded us of our favorite pizza place Pizza Antica. Take a look at their menu for inspiration. Also, check out the other Daring Bakers for even more inspiration.

Posted by: familiabencomo | Saturday, October 11, 2008

Hello!

I wanted to write a quick note to let you know that I am still around…. Goodness, I can’t believe how quickly the time has flown by! Today is the annual walk-a-thon and silent auction at my children’s school. I’m up extremely early with anticipation because this one day is the culmination of 6 months of planning. Part of me wants to complain about being so busy, but in truth I’m blessed to be able to work on this project for my children’s school.

Anything for the students – this is me as the school’s mascot during lunch!

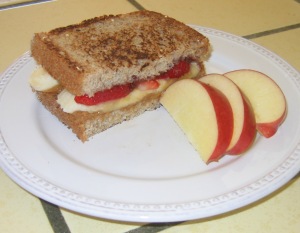
I’ll leave you with a great after-school snack. This is a healthy, tasty & easy treat. Perfect for those busy days when you only have a few moments at home before you have to run off to the next thing. Also, the fresh fruit adds Vitamin C, potassium, fiber & antioxidants to keep your immune system strong.

Grilled Peanut Butter and Banana Split Sandwich

(found in the latest Splash magazine)

  • 2 slices whole grain bread
  • 1 T all-natural peanut butter
  • Dash of cinnamon
  • 2 t honey
  • 1 large strawberry, thinly sliced
  • 1/2 small banana, thinly sliced
  • 1 tablespoon 100% strawberry fruit spread

Stir PB, honey & cinnamon together. Spread onto one slice of bread. Evenly place strawberry & banana slices onto bread. Spread other slice of bread with fruit spread. Carefully assemble sandwich. Toast on skillet or panini cooker.

Posted by: familiabencomo | Sunday, August 31, 2008

Daring Bakers’ August Challenge

I am SOOO darn proud of myself for completing this challenge!!! I came home yesterday from spending EIGHT hours in the sun at a swim meet & then spent the next 3 hours whipping these eclairs together. They’re not as pretty as I would like them to be, but I did learn a lot and I enjoyed every bit of making them (except the clean-up!). We’re having company for dinner tonight & this was the perfect opportunity to try something new. I can’t wait for the final verdict. My family loved them – that’s what counts most!

LESSONS LEARNED: 1) Less is more – I thought if I squeezed out big “fingers” of dough that I would have big eclairs…. No. They just didn’t cook all the way through. 2) Do strain the mixture after tempering yolks the for the pastry cream even if you do not see any scrambled bits – they really only show up after you add the chocolate & by then it’s too late. 3) Break this recipe up over a couple of days – it would be easy enough to do if you have the foresight to think of it.

Thank you MeetaK and Tony Tahhan for challenging us with Chocolate Éclairs by Pierre Hermé. I can honestly say that I never would have thought to make these on my own. Merci!

To see some truly amazing Eclairs check out the other Daring Bakers.

Posted by: familiabencomo | Wednesday, July 30, 2008

Daring Bakers’ July Challenge

This month’s challenge was to prepare Filbert Gateau with Praline Buttercream, from Great Cakes by Carol Walter. The very lovely & talented Miss Chris of Mele Cotte was our fabulous hostess and I was sooo looking forward to participating in this one because I enjoy everything that Chris creates – she has such a wonderful, heart-felt blog. However, life was crazy-busy this month.

Thank you Chris of Mele Cotte for coming up with this challenge! I can’t wait to do it in August! To see some amazing cakes check out the other Daring Bakers.

I leave you with this photo taken in Sausalito overlooking the San Francisco Bay…. Just a reminder (to myself at least) that there is beauty in balance. Wishing you all an enjoyable, relaxing, even-keel summer.

Posted by: familiabencomo | Friday, July 25, 2008

Salmon Patties, Taboule Salad & Grilled Zucchini

One of the family’s favorite meals include salmon patties. I don’t know why, but when I tell them that this is what we’re having everyone gets excited for dinner time. I love serving salmon in any form – it’s my favorite fish, it’s healthy, I never hear complains from anyone. The only draw back is that it’s usually pretty expensive to buy fresh wild coho salmon on a regular basis & I refuse to buy any fish that is “farmed.” Then, when you’re buying fish fresh you hate to chop it up & turn it into patties. However, I have been pretty lucky to find coho salmon frozen at Trader Joe’s & I can mash it up into patties guilt-free. Simply combine salmon, chopped green onions, Italian parsley, bread crumbs, eggs salt & pepper. Then, fry in a pan with canola oil. Easy!

Typically, I serve my patties with either a garlic infused couscous or taboule salad. Couscous is so wonderful to cook with because it is SO darn easy to prepare. If you’ve never tried it before, then please do. You will be shocked by its simplicity.

TABOULE SALAD

  • 1 ¼ C couscous
  • 6 T EVOO
  • 1/3 C fresh lemon juice
  • 1 diced tomato
  • ¼ C chopped parsley
  • 1 diced green onion

Bring ½ cup water to a boil. Add couscous, EVOO, lemon juice. Mix well, cover & remove from heat for about 5 minutes. Fluff with fork. Add tomato, parsley, green onion. Serve at room temperature or chilled.

For the grilled zucchinis, Marie of Proud Italian Cook inspired me to try something new. Zucchinis just happen to be one of those vegetables that I overlook every time I’m at the store. Yet, they are remarkably tasty. Having them grilled is divine! Look here for her recipe.  This really has a wonderful combination of flavors and, trust me, there will not be any leftovers…. make more than you think you will need.

I hope everyone is having a fun summer!  Only 4 more weeks until school starts!!!

Posted by: familiabencomo | Tuesday, July 15, 2008

Maccha Marble Cake

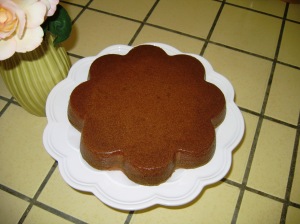
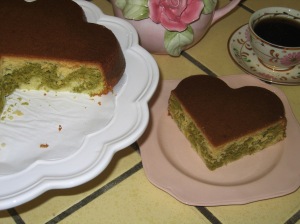
Maccha (or matcha) is a special quality Japanese green tea. I have seen it mentioned a few times on Diva’s The Sugar Bar. She really raves about it & has found a myriad of uses for it. So,when she posted her Matcha Marble Cake last week I drove directly to Mitsuwa in search of this fine green powder. It was relatively easy to find after I asked a fellow patron to help me.  Then, on the hottest day of the year, I lined up all of the ingredients to bake my cake. Truth be told, I had just ordered a new baking form & was desperate to try it out. I was totally giddy as I worked with a new recipe AND used my new baking toy!

Diva’s recipe was pure heaven. I had to make some adjustments because I didn’t have self-rising flour & I was not eager to purchase a 4th type of flour for my already fulltothehilt pantry. So, below are the ingredients with the US conversion measurements & here is Diva’s original recipe.

  • 1 cup unsalted butter, softened
  • 1 cup granulated sugar
  • 2 c. sifted cake flour
  • 1 tsp. baking soda
  • 1 tsp. baking powder
  • 1/2 tsp. salt
  • 4 eggs
  • 3 tbs low-fat milk
  • 1/2 tbs vanilla extract
  • 1 1/2 tsp maccha powder

We all thoroughly enjoyed the cake. I felt quite fancy having the marble effect (1st time for me) in my cake. Also, since green tea is an antioxidant, I considered this as “health food” and savored every delicious bite without guilt.

Posted by: familiabencomo | Monday, July 7, 2008

Sweet Potato Fries & Pesto Pizza

I hope everyone had a great 4th of July celebration! We took it easy with a family bike ride to the cabana & burgers on the grill… The only thing missing was apple pie. It was nice having the extra day off to relax.

One of the special treats that I make when we grill hot dogs (all beef nitrate-free, please) or hamburgers is Sweet Potato Fries. These really compliment the meal so much more than regular fries. Plus, they satisfy that primal need we all have for fries without the added grease, starch & empty calories. Simply coat sweet potatoes with EVOO, add a light dusting of sea salt, then bake at 425 for 20 minutes (turning once).

Despite all the praises I give MY fries, I would be amiss to leave out two great posts that I saw over the weekend on french fries. Lori Lynn of Taste With the Eyes enlightens us with some new tempting flavors in a Trio of Duck Fat Fries and Peter of Kalofagas beautifully explains the Canadian tradition of Poutines in Happy Birthday Canada. These two posts alone will have me buying a deep fryer soon!

I know this the third time that I have posted a pizza here…. However, I have recently perfected my dough and thought it was important to share the extra step. You see (true confession here), I have always had trouble with my dough rising. When they say “until dough doubles” I thought that must be some arbitrary measurement because my dough NEVER doubled. So, in the past, my pizzas have been huge wafers with sauce & cheese. Then, during my last Daring Bakers’ Challenge it called for agitating the water & yeast for about 5 minutes before adding the flour – this one step has changed my life. I have now made pizza twice in one week and have actually witnessed this thing called “Doubled.” Even better, I have finally “punched” the dough. Following is my revised dough recipe:

Pizza Dough
· 1 Cup warm Water
· 1 pkg Active Dry Yeast
· 3 Cups All-Purpose Flour (optional: replace 1 cup all-purpose with 1 cup whole wheat as seen in photo)
· 2 Tbsp Olive Oil
· 1/2 Tsp Salt
If possible, use the hook attachment on your standing mixer to combine water & yeast first – mixing on a low speed for about 5 minutes. Add about half the flour, mix well still using a low speed. Then, add oil, salt & remaining flour. Continue to “work” the dough in the mixer for about 5 minutes adding flour if it looks sticky. Place dough in a lightly oiled bowl, cover with towel & let it rest for about an hour until it doubles in size. Once risen, place on lightly dusted counter again, divide it in two (or more) balls & cover again for 15 minutes. Finally, dough is ready to be shaped, topped & baked.

I would like to thank Abby of Eat the Right Stuff for suggesting pesto as a topping for our pizza. The aroma from baking a combination of bread & pesto is to-die-for! The nuttiness from the pesto was a surprise scent that lingered in the air to make us even more ravenous. For the pesto recipe, please go to either Maria’s, Deeba’s or Peter’s site. They are all unique AND fabulous!

Older Posts »

Categories